For vibecoders
Your AI just wrote code. Docent tells you what it did.
A local window that reads your coding agent's session and explains its questions, results and plans in plain Korean. It never touches your code. Send your agent one line and let it handle the install.
Read https://github.com/foxion37/vibecoder-docent/blob/main/INSTALL-AGENT.md and install Vibecoder Docentnpm install -g github:foxion37/vibecoder-docent
docentNeeds Node.js 22.19 or later and a signed-in omp. Opens at http://127.0.0.1:4747.

- Version
- v0.18.0
- License
- MIT, free
- Screens
- Web, mobile PWA, terminal, macOS
- Needs
- Node.js 22.19+ and omp
You don't need to read code to direct it.
Coding agents leave walls of diffs and error logs. If you can't read them, all you can ask is "Is it done?", and the session stalls on the same instruction. Docent sits beside your session like a museum docent: it explains the work and never touches it. You understand what happened, then decide what comes next.
Separate window
Ask without breaking the flow.
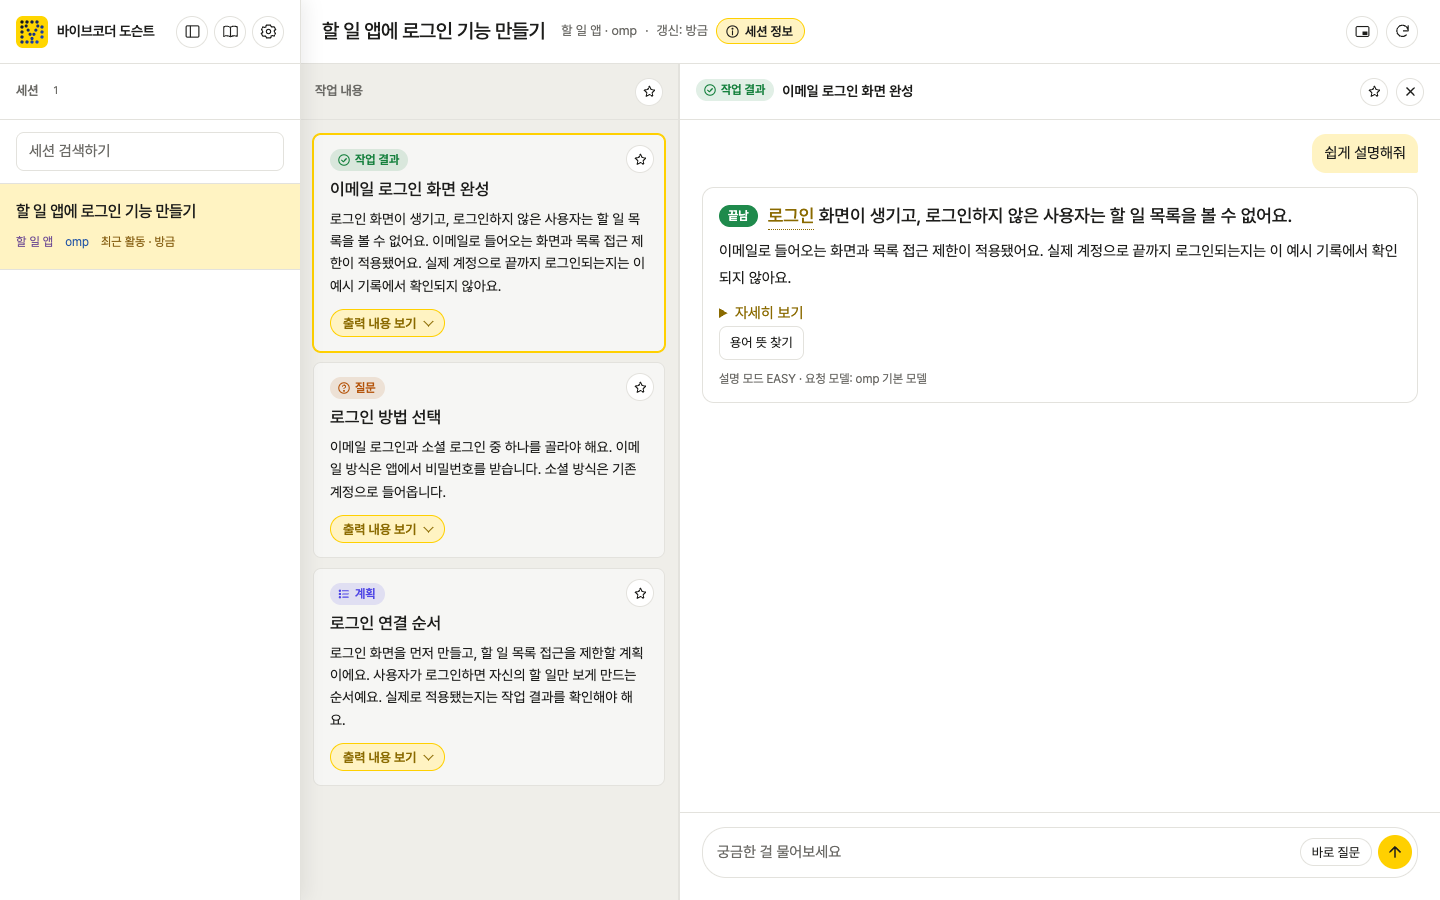
Asking your main agent "what did you just do?" interrupts the work, and the answer comes back in developer talk. Docent answers in its own window. The omp that writes the explanations gets one tool, file reading. Its instructions block edits and command runs, and when it doesn't know, it says so.
read filesThe one tool it getsedit filesBlocked by its instructionsrun commandsBlocked by its instructionsunsureSays it doesn't know
Work cards
Only the questions, results and plans.
Work cards pick the AI's questions, results and plans out of the session, newest first. Open a card to talk about it, as in "why did you do it this way?", then turn what you learned into your next instruction.
Glossary
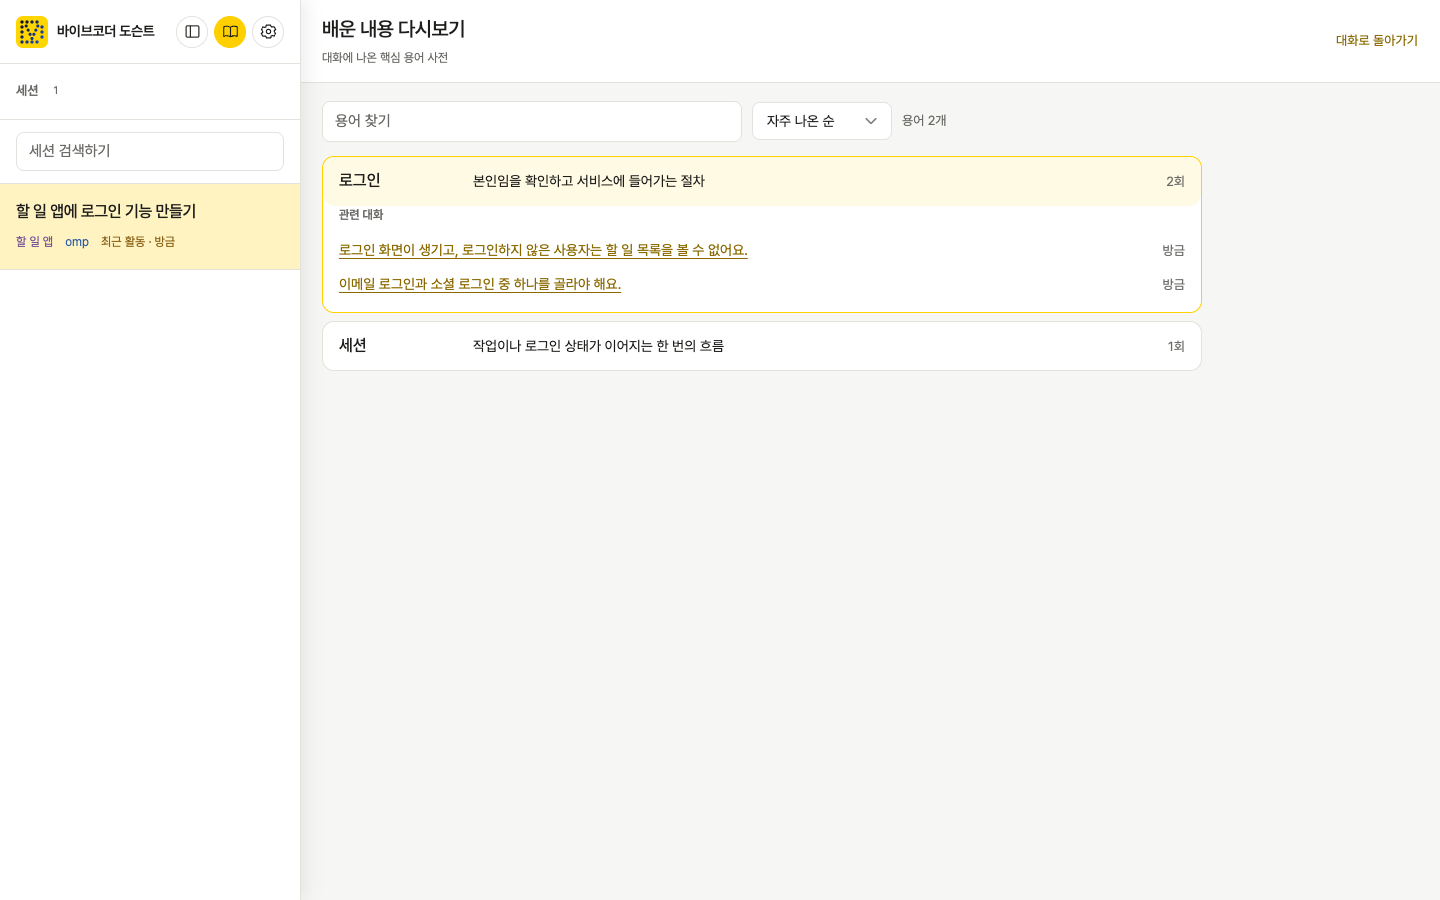
The words you ask about become your glossary.
Review mode collects the key terms from your questions and answers, each with a one-line meaning. Ask about the same idea again and Docent takes it as a sign that the explanation didn't land, so it explains it a different way.
And the small things are thought through.
Most of them stay out of sight until you need them.
Four screens, one server
Web app, mobile PWA, terminal TUI (docent-tui) and macOS app all use the same local server at 127.0.0.1:4747.
Picture-in-picture
In the browser, pop Docent into a small window and keep it next to your work.
Health check
docent doctor checks the install. Add --probe to call the model once and confirm your omp sign-in.
Other computers
--peer name=URL adds sessions from Docent running on another computer.
Your model, your choice
Pick the explaining model from any provider you have signed in to in omp, such as Anthropic, OpenAI Codex or GLM.
Use the agent you already use.
Docent reads sessions from these agents and lists them together.
- omp
- Claude Code (with subagents)
- Codex CLI
- Gemini CLI
- pi
Before you start
- Explanations are written in Korean.
- omp must be installed and signed in, or no explanations appear.
- Each explanation calls a model and costs money. Prices shown in the app are estimates, not your bill.
- There is no sign-in. By default it opens only on your computer (127.0.0.1). Share it over Tailscale only on a private network you trust.
- Session text goes through omp to the LLM provider you chose. If a transcript contains a password or similar value, it goes too.
- Automatic card picking needs an optional TYPESAFE_API_KEY. Without it you still ask questions yourself.
- You build the macOS app yourself, and it is not signed or notarized. Version 0.x changes often.
One line to your agent. Then back to your work.
Send the link, pick from a few choices and sign in to omp. That is all you do.